The week after the concrete pour was spent taking down bracing no longer needed and preparing the trusses. So, how does one prepare trusses? I didn't know but I learned.


 The next truss in the stack is then rotated into position, and using the labor intensive method of the Egyptian pyramid builders, slid up the inclined plane and dropped exactly on top of its predecessor. Then, with the aid of nail guns, 1,478 or so size large nails are driven in to lock the newcomer to the one below. This process is then repeated for the last two trusses.
The result is one big thick four ply girder truss. Like Bob said when he stopped by the site, "Some assembly required." At that point the final resting place for these girders had not yet penetrated my brain.

Putting Up Trusses -
Upon arrival, I find a group of grown men bent over a 4 ply laminated girder truss swinging hammers and making an awful racket for so early on a Saturday morning. These workers nailed hangers on the two girder trusses. I was reminded of one father who gave his several sons a few scrap pieces of wood, gave each one a hammer and a box of nails and told them to have a go at it, figuring to have his boys busy for a while.
There was also a crane on location. And when all the prep work was done, the real fun began with the launching of the gable end truss.

 After it was guided into place, the nailers attacked with vigor. Lars, Sam, Troy, Steven and Brent attach the bottom with the requisite 8,400 nails while the high level work is being done by Bob and Nate in the lift bucket.
 Then I got a reminder of why I was never much interested in doing roof type construction. Lars, entwined with the vertical slats of the truss, leans out to drive securing nails through the support braces from the outside.
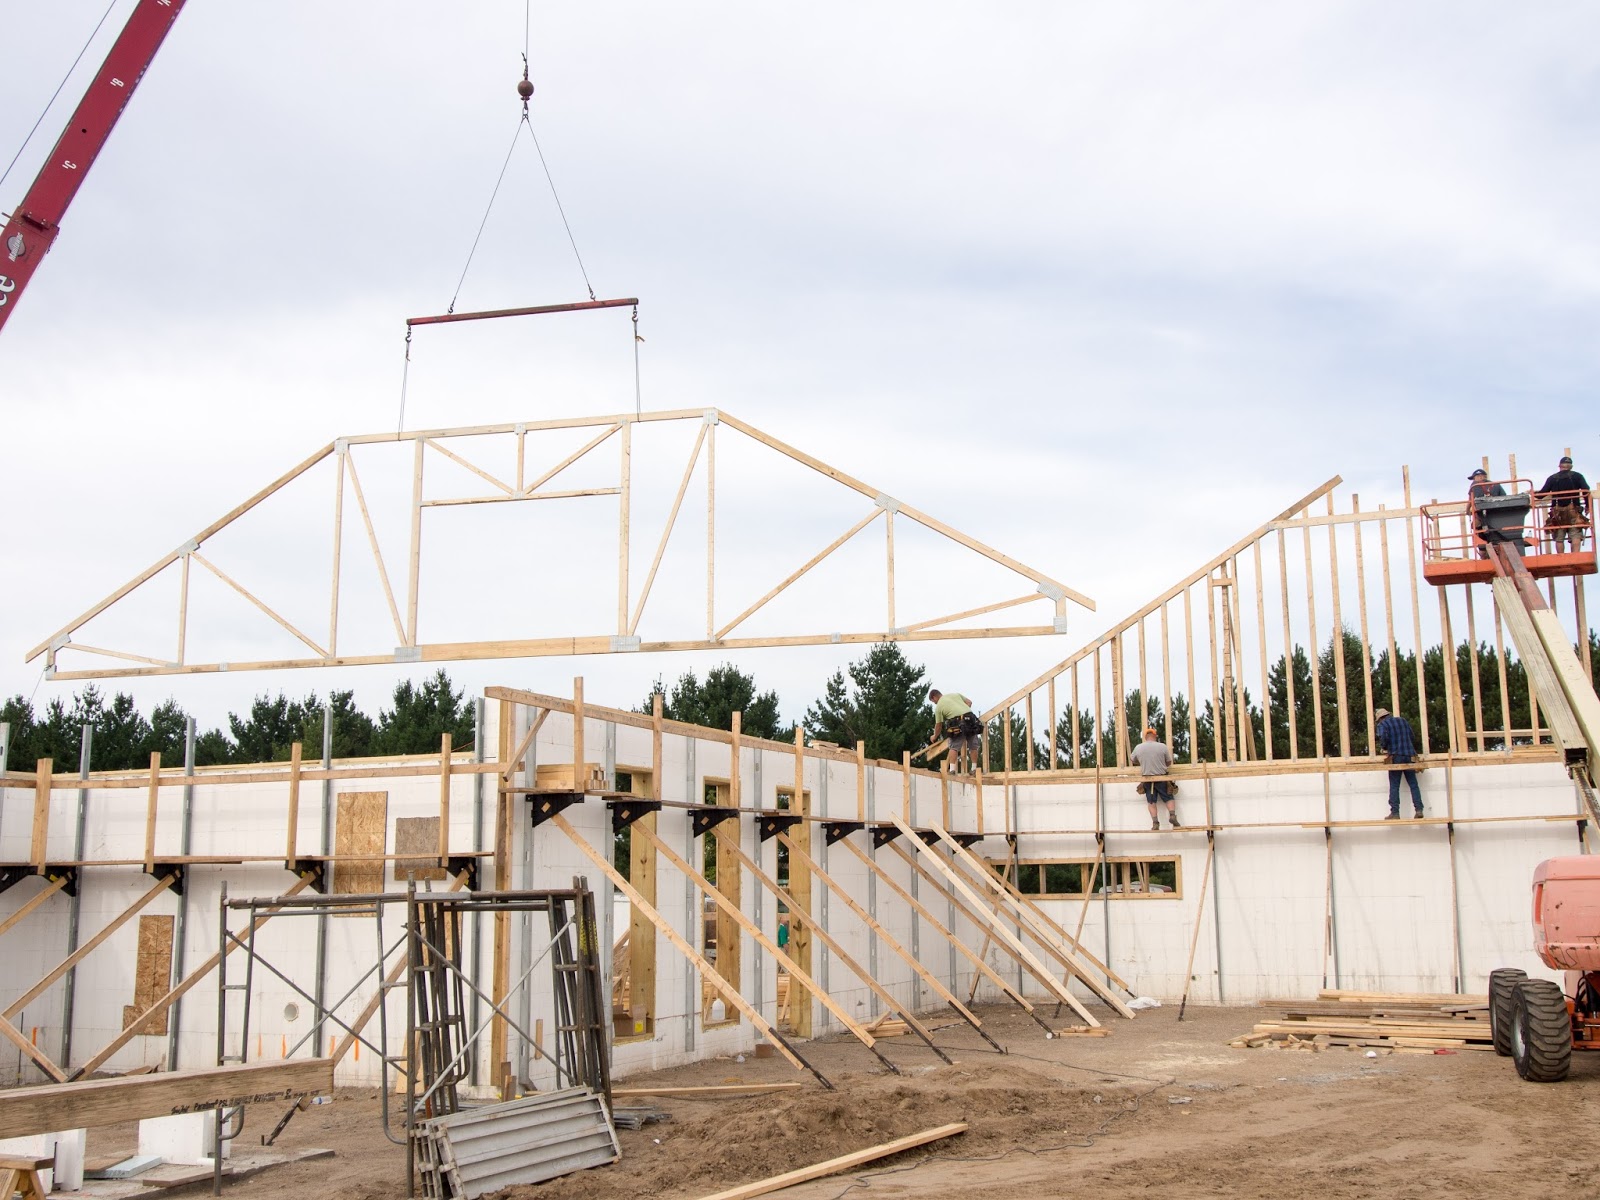

Lars readily avails himself of this opportunity and ascends the top member of the truss.

Lars does not carry his brace pieces with him so they must be delivered up to him. Sam assists by sending the 2x4 chunks via air mail. That way Lars has an opportunity to keep his ball playing skills sharp while maintaining his balance on the top of a truss.

It takes many people to put up trusses. Here Sam practices on the balance beam, Lars and Nate work the top, Bill, Troy, Kevin, Loren and Brent work the top of the wall. Bob floats around in the lift bucket looking for all the world like a quidditch player from the Harry Potter series of books. In addition to his quidditch work, he also positioned the lift bucket to keep the truss from falling towards me, that is away from the workers.
So the trussing continues, two by two until the entire dining hall and kitchen are all trussed up.

 Meanwhile, down on the ground, the post folks are erecting eight posts, four on either side of the main channel that runs through the sanctuary and the dining area. These posts will support the 4 ply girder trusses built earlier. Dave Wuollet, Mike Forstie, Tom Skoog, and Charles Skoog are the postmen.

The second girder truss is taking off. The trusses are supported by cables attached on each end of a long bar. At the other end of the cable is a loop. Each cable is run through the truss then attached to the hook on the arm. After the truss is put in place and adequately supported, the person working on the truss must unhook the cable loop so the crane can return truss free.


 Meanwhile, down on the ground, the post folks are erecting eight posts, four on either side of the main channel that runs through the sanctuary and the dining area. These posts will support the 4 ply girder trusses built earlier. Dave Wuollet, Mike Forstie, Tom Skoog, and Charles Skoog are the postmen.
The second girder truss is taking off. The trusses are supported by cables attached on each end of a long bar. At the other end of the cable is a loop. Each cable is run through the truss then attached to the hook on the arm. After the truss is put in place and adequately supported, the person working on the truss must unhook the cable loop so the crane can return truss free.

The girder is placed on the posts and fastened to the wall on each end. A few dozen additional braces are attached to stabilize the posts and the girder. Trusses are then run between the two girders resting on the hangers that were being attached early in the morning. So now I know why the girders had to be perfectly straight, why they had to have so many plies and why those guys were making all that racket attaching hangers. Those girders have a lot of work to do. Clever fellows, those Americans.

Looking up from the dining area we see the leftmost truss is attached to the girder. It is also attached to the girder that is out of sight off to the left of the picture.
A Brent's Eye View -
Brent Huhta sent a few pictures taken from on high as he worked up on the trusses. The view is a little different than my normal perspective which is with both feet firmly planted on mother earth.
 |
| Panorama |

 |
| The church as it looked at the end of the work day. |
Thank you for your post. This is excellent information. It is amazing and wonderful to visit your site.
ReplyDeletetruss rental orlando