A Time to Plan -
Somehow this week's picture looks a lot like last week's picture - the planning commission still in session. Well, not literally still, but again.
Planning time was available since The Blue Duct did not hold his pressure for the first test.
Not wanting to waste the time while TBD received further instruction, the workers planned, and in anticipation of ultimate success of the project, began reserving seats in the sanctuary.

After a good deal of intense instruction including more goo, more tape and some new bands, TBD successfully completed his five minute pressure filled examination and was then eligible to receive a full covering of dirt. So Saturday was used to backfill the trenches and bury The Blue Duct.
Many Workers and an Excavator -
Busy workers - Greg on the machine, Spencer and Lars partially hidden beyond the machine, Eric operating the compactor, Tall Sam spreading dirt, Brent standing at attention and Mark taking pictures.
As the excavator moved the dirt from the pile, shovel and rake operators did the fine tuning. Loren, on the far right, is checking the floor height relative to its final grade requirement. Bob worked inside for a time then went outside to trim the windows. He said he did not think he could make the grade.
Some thoughtful reflection is required to make sure the dirt is properly located. Spencer, Lars, Brian and Tall Sam are thoughtfully reflecting.
Brian and Sam continue reflecting. Some decisions just cannot be rushed.

The civil engineers used available lumber to build size large beams so the excavator could be driven over the partially buried center aisle ducts. Brian and Sam pile dirt to stabilize the beams on the far side while Lars and Mark do the same on the near side. Greg checks the alignment with the machine treads. In the background a nice level, trench-less, hill-less left side floor of the sanctuary.
Once across the bridge, the hill on the other side is being rearranged to fill the center trench.
Another New Thing -
I love photography and all my experience is with still photos. I have not ventured into this new fangled video stuff even though my camera does record video. Some scenes, however, seem to demand recording video instead of still.
--- UPDATE ---
Okay, I tried but admit defeat. The wonders of technology are beyond my comprehension.
I edit this blog on a Windows machine and the video works. On my iPad, no video and only a blank spot is displayed. My Android device tells me it is missing a plugin. So, I added the still photo of Short Sam using the pipe heater since I do not know how to make the video display in these varied environments.

Okay, Sam (short Sam as opposed to Tall Sam), what are you doing? "Making spaghetti," came the reply.
The green box is a heater through which the rigid plastic is placed. The operator spins the pipe and moves it forward and back until the desired length of the pipe is warm enough to bend. Then, with the help of an assistant, the pipe is bent to the desired curvature. When it cools, the pipe again becomes rigid. Kinda like makin' spaghetti, Sam, but not quite.
Using the excavator to make a trench, the pipe is run up to the front of the sanctuary. This is the conduit through which the sound system cabling will run.

Sam and Loren bend and coax the pipes into the necessary shape to fit into the trench.

Using the widely accepted free pour application technique, glue is slopped on to the pipe and connecting pieces added. The ninety degree elbow pieces being glued on are stock parts and do not have to be custom formed as the long non-standard bent pieces do.
I finally get to see some honest to goodness duct tape in use. Alas, it is only to temporarily cap the ends of the pipes until the concrete floor is poured.
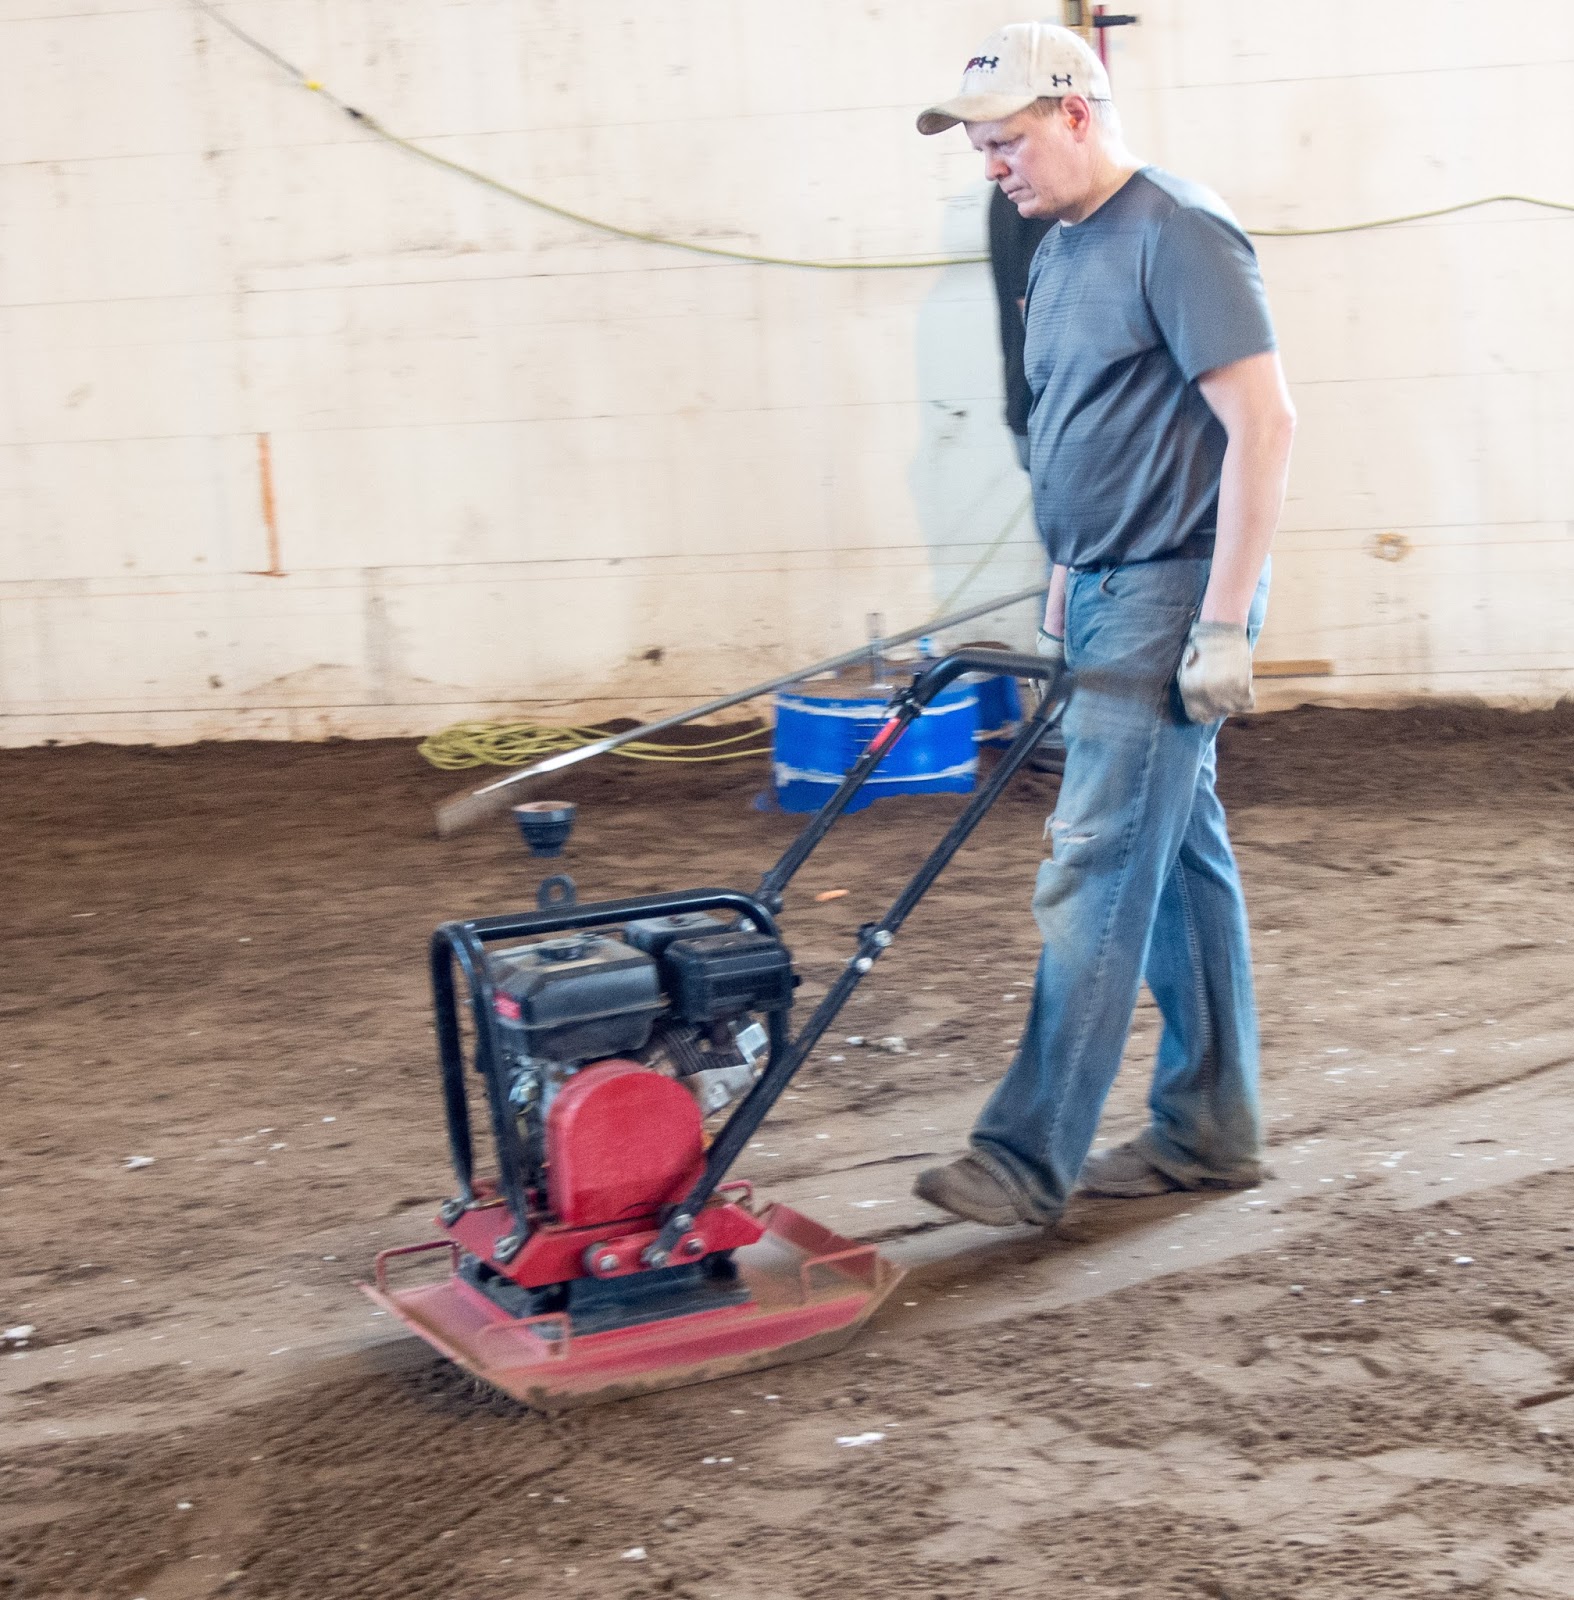
Leveling the Floor -

Our old friend the laser beam is again employed to help level the dirt floor. A shallow grave is dug and the laser rests therein, with the beam shining at the proper level. Any dirt that gets hit by the laser must be removed.
Rake and shovel operators then attack the red-illuminated material with vigor, driving it just below the beam. When only a tiny ridge shows, the operator will stomp it down with his foot. Watching this whole process is like watching the videos of cats chasing the red dot from a laser pointer.

The compactor gets into the action, fine tuning the dirt surface. Eric noted that when the dirt surface is very near level, the compactor will run itself, without human intervention. Look, ma, no hands!
One Final Note of Interest -
When I arrived Saturday morning, Troy was busy with the welder and the portable grinder. What are you up to, Troy?
"Just repairing the door for the mobile forklift."
It seems that the door can swing all the way around to the front and tangle with the wheel. Should that happen when the machine is in motion, the door does not perform well.
When your door falls off it is nice to have someone who knows how to put it back on.
 It seems like once The Blue Duct was safely interred and the dirt leveled, the next step should be to pour the concrete. But not so. First the dirt needs poly covering followed by two inch think foam pads.
 Then some nuisance things like locating outlets that will be in the floor must be attended. Sam and TIm decide where the junction box needs to reside. Once the location is finalized, it must be fed by conduits which are cut into the foam pads.


 With all the emphasis on the floor prep inside, the mild winter weather allowed for significant progress on the outside of the building. A milestone of sorts was achieved Saturday when the first piece of actually, factually siding was nailed in place. Tom and Ben are shown building the outside corner for the siding. Once the corner is in place, the first piece of lap siding is hung. There are about 8,250 square feet of wall to be covered. Each board of lap siding will cover about 9.3 square feet. So, one board down and 884 to go. The purists will complain that not all of the wall surface will be covered with lap siding since the front and back bump-outs will have sheet goods applied, but this is a detail. I am sticking with 884 to go.


 Bob had his boys secured in the lift bucket. I thought at first that he was using the bucket to keep the boys under control, but it turns out that they were helping him measure and record measurements for trimming the various openings for vents and the like.