Donations Appreciated

Thursday, October 6, 2016

October 4 - The Inspiration for Invention Is Either Necessity or Bob

The Invention -
The way I heard the story, Bob asked Ken before church for a better way to raise the Sheetrock up for installation on the firewall. By the end of the sermon, Ken had sketched out the design on the back of his child's Sunday school worksheet. It is possible that I misunderstood some detail point, but that is of little consequence. There is still a bunch of Sheetrock to hang so let us now innovate to make the job more manageable. Ken's design, using exotic materials like boat anchor rope, a ratcheting pulley and a tow strap was built with one trip to Home Depot. I saw the thing in operation and it actually worked quite well and has a simple elegance, but lacking either a blinking light or a beeper, it is definitely not high tech. I asked Ken what he named the thing and he offered three choices. S.P.E.E.D.Y., SWOOPER and WHISTLER. Each will be discussed in this blog post, but first, some pictures of the device in operation.


Andy attaches the ratcheting pulley to a brace attached to the firewall. The rope is long, perhaps thirty or forty feet in length.


On the end of the rope is a ring, which is apparently how boat anchor rope is sold. The ring can be seen just to Sam's left on the face of the panel. The rope going up to the pulley is hanging down from above across the face of the panel.  You can also see a loop of rope that is threaded through the ring and then wrapped around the bottom corners of the panel. The free end of the rope is off to the left of the panel and on down to the floor.

Getting the picture? Pull on the free end of the rope and the panel will rise into the upper regions. The ratchet on the pulley assures that the panel will not fall back towards the earth. Some additional stabilizing is required to keep the panel from just tipping backwards or off to either side.


 The tow strap also has a ratchet so it can be tightened around the panel and the rope that will raise it. The rope is threaded through the fastener on the tow strap so that the panel cannot tip too far either to the right or the left.

All that remains now is to add the motive force to raise the panel.


A couple of good tugs on the free end of the rope and the panel begins its upwards journey.


Now for the names and Ken's explanation -

S.P.E.E.D.Y.
single. panel. easy. elevation. device...Yep.


SWOOPER
single wheeled object or panel elevating rig


Andy, on the top of the wall needs to properly position the panel and secure it with nails or screws near the top. Pete and Tom are helping to maintain the position while Andy applies the fasteners.


WHISTLER
wery handy, individually staffed, thing lifting easily rig
Or that may be the sound heard from the operator while using it.

The original sketch depicted an operator whistling while using the device.


The inventor of the pulley is apparently lost in antiquity but Archimedes is credited with adding some sophistication and developing the block and tackle.


Cutting Room -

The street light was hauled inside the building so the panel cutting became a bit more convenient.


Sam and Tom measured twice and cut once.


Through Bolts on the Girder Trusses - 
Just in case the twelve-hundred-eighty-seven or so nails pounded and shot into the four ply girder trusses during assembly are inadequate to prevent ply separation, every four feet a carriage bolt is run through the whole mass and a nut is securely tightened on the end of it. I am not sure what might cause the individual plies to want to divorce its neighbor, but the bolts will likely reduce the urge.
Randy scoots along the adjoining trusses first boring a hole through.

Then pushing the bolt through said boring.


Finally, tightening the nut on the threaded end.
I am not keen on the aesthetics of a bolt every four feet, but if the design engineer puts it in the plan, then let us be bolted.


Sunday, October 2, 2016

September 30 - October 1 - Entombing the Firewall

Sheetrock on the Firewall -
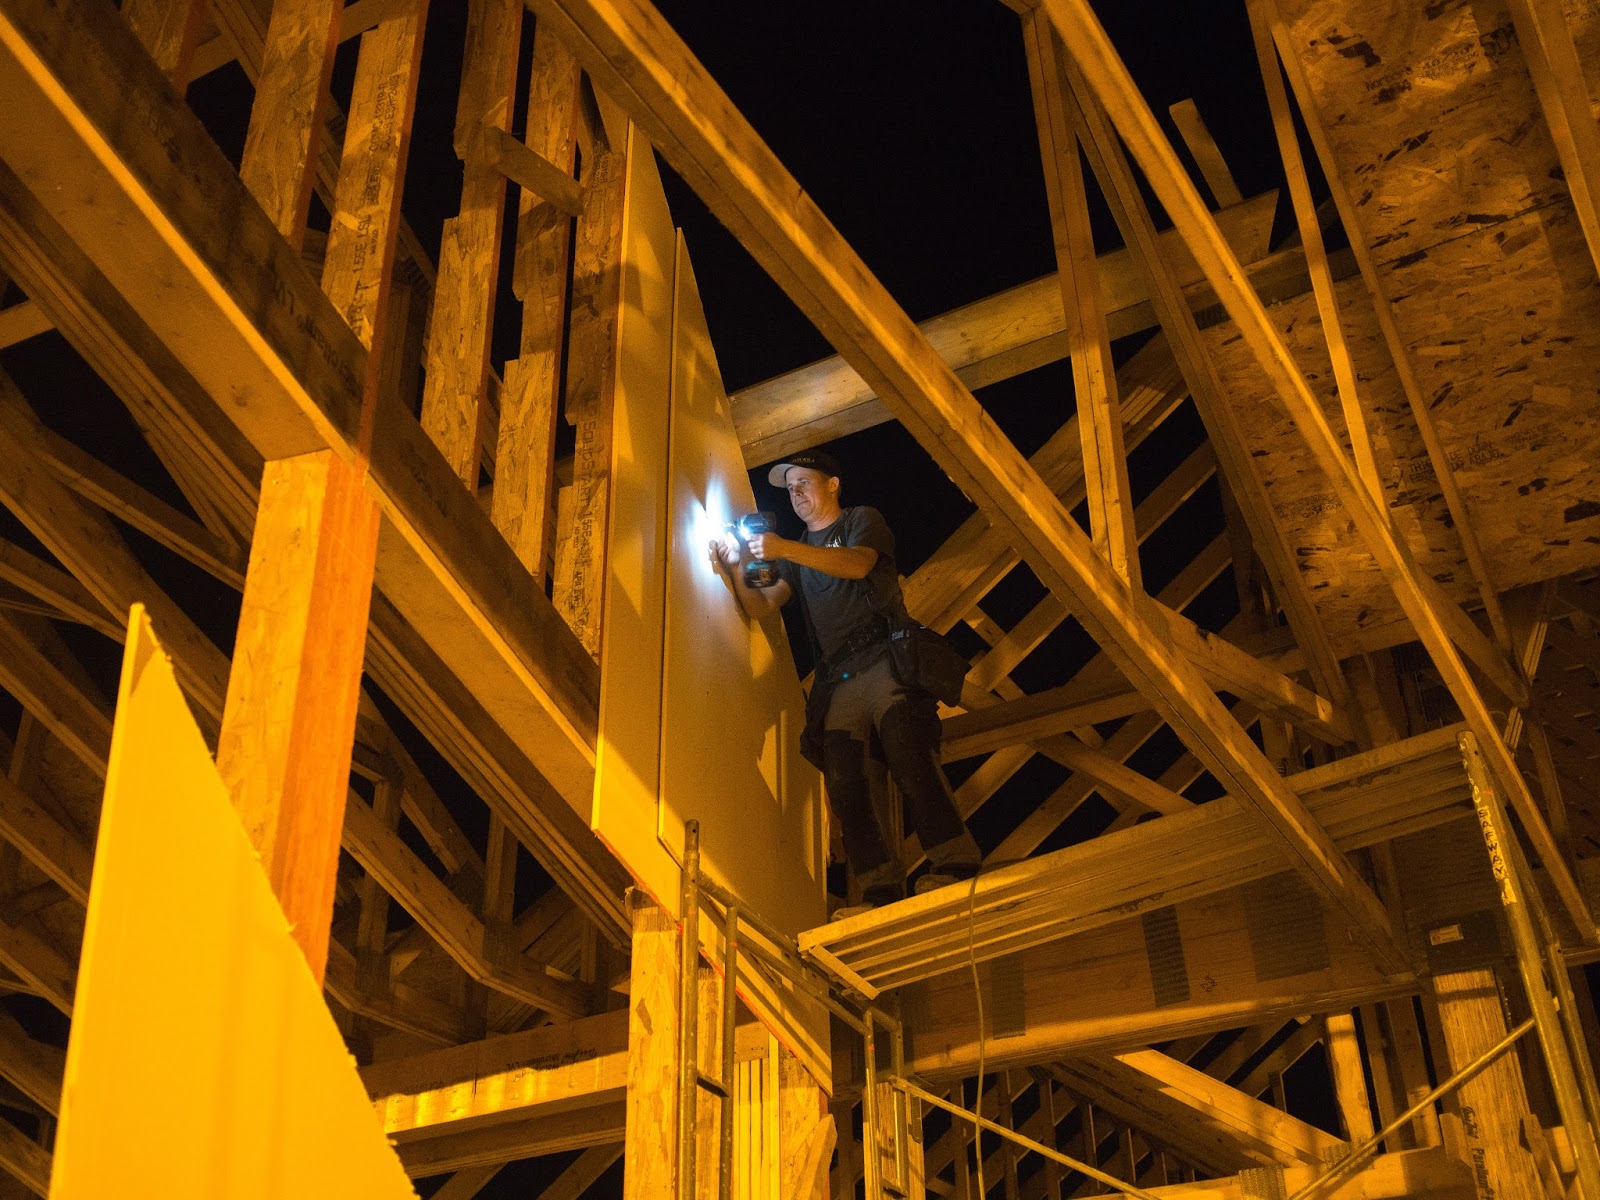
With September now history and autumn officially here, daylight at the building site checks out early. So, thanks to Thomas Edison's diligence, the work can go on after the daylight flees. With an elegant light stand and a long extension cord, illumination is brought to the Sheetrock cutting station providing Dave with enough light to measure and cut the material. The scene somehow reminded me of the streetlights in the neighborhood of my youth.

Inside, the first piece of Sheetrock is hung, Bob carefully measures and sets the piece in place. After patiently eyeballing the placement, he vigorously attacks the task with a nail gun, keeping the Sheetrock chunk from wiggling free.
Another piece is cut outside, hauled in and without the least bit of imagination taking hold, it is put directly over the first piece.

Well, I suppose if two layers are needed, it is not necessary to finish the first one before starting the second. It all depends on the situation. You can't very well apply the second coat of paint before  you finish the first one. With the uncertainty of life, however, I do occasionally eat dessert before dinner.


Into the dark of night the workers pressed on. A while later, some noticeable progress was apparent.


While the workers toiled with the Sheetrock, the younger folks enjoyed seeing the lumber scraps converted to ash. I sent a picture to Brent letting him know that at least the BTUs were being put to a good use, albeit not heating his house or sauna. He was pleased the scraps were not going into the dumpster. 
Saturday morning brought bright sunshine with no need for electric lights, although the recreational fire was again burning. Earlier in the morning the fire helped burn off the fog. Eric Wuollet sent this photo. The chronicler arrived too late to see morning fog.

It is one thing to hang Sheetrock where you can readily put it in place while using a ladder or scaffolding, but getting it up to the peak of the wall requires a bit more doing. Since Sam Roiko is the tallest, he was doing the high stuff, but even his height was inadequate to reach the top and he needed to do a bit of climbing first. Then several folks were needed to hoist the material into place. The task was further complicated by a truss residing very close to the firewall. The sheet had to be slid up the wall, making the whole setup resemble a guillotine, lacking only the razor sharp blade. With perseverance and a good deal of muscle, the sheet was raised into position and secured with nails and screws. No fingers were lost in the process.

Maneuvering the heavy sheet goods up to the peak required a significant investment of manpower. There are two Marks and a Kevin on this side pushing up and one or two more on the other side with just body parts showing. Sam is on top ready to grab, hold and put in place with one hand.


Sam's son, Ralph, is very interested in the action as his dad clambers around in the highest part of the building. While I did not stay until the end of the work day yesterday, I know Sam made it through all right since he was serving communion this morning at services.


In the photo on the right we see the Sheetrock in place at the peak of the firewall. I feel a hint of disappointment that when the firewall is fully covered, no trace of the complexity of the work involved in its creation will be visible. Ah, well. Bring on the Sheetrock.


I think Sam earned the Peak Performer award for his efforts on Saturday. Here he is shown looking over the very top of the firewall, hanging on with both hands.


Other Activities - 
While the Sheetrock dominated most of the inside work, Paul, Troy and Spencer added more lookouts, this time on the back wall of the rear bump out. Here Paul and Spencer are on the roof while Troy was operating the mobile forklift.


And in the dark recesses of the far corner, Mark dug a hole for the sump basket, into which our old friend, the anaconda, will empty whatever contents it can accumulate. After a bit of digging, a hole emerged and the plastic basket was dropped in. I overheard one of the bosses mention the possibility of duct tape being used to secure the ends of the drain tile to the inside of the basket. I can hardly wait to see if that really happens.


After some Sheetrock was up, Bob wanted to make sure it is protected from the water should it rain. So the first bit of roof was put into place. I have to admit surprise and a little disappointment with the roofing material selected for the job.


Now that the building is shaping up somewhat, it is time to get going with church cleaning. It looks like Victor got assigned to the first crew. If church cleaning has got its start, can services be far behind?


Wednesday, September 28, 2016

September 26 - More Firewall Details and a Change of Seasons

Firewall Framing Nears Completion -
The big, complicated firewall is nearly all framed up. And it looks rather pretty with its red-edge-trimmed boards. The manufactured boards have a distinct advantage over natural, tree grown, boards in that they do not warp. They will stay straight. The boards are also significantly harder than natural boards. The nail guns do not sink the nails completely so they must be driven home with powerful hammer blows. Sam noted that some nails were bent in the process. One man once told me that 'threaded nails' hold better, so maybe those bent ones that get rapped in are an improvement on straight ones.
Openings for the windows and doors are framed up.The opening in the center is for doors. The larger openings on each side of center are where the windows will go. The windows will not be that big but will be framed up within that opening. If the headers over those openings were placed at finished height, an additional horizontal beam would be required, so those headers being up in the sky satisfy the structural requirements.


The headers are rather beefy looking. Three and one-half inches of laminated wood standing on edge. A double thickness of the material pictured below.


Building materials and techniques are all about carrying weight. Sam talks about carrying the weight of the roof, complete with an eight foot or so snow load, if my memory serves me correctly. He might think I am stretching the snow load, but this isn't Florida, you know.
Concrete footings under the walls. Concrete filled foam blocks make up the walls which support the trusses.Big girder trusses carry the weight of the center of the building. And now the firewall has to be strong enough to hold up its share of the weight. So we use all these glued up, resin filled manufactured wood products. Products that were not available to people who used solid walnut beams to build their barns with. Check out all the air space in the top picture of this post and the one below. I figure we are holding up the roof with 12% solids and 88% air.


Trusses, bring on more trusses -
The piggybacks over the front entry are now installed. So, now we have a  peaky rather than flat top foyer. First they were hoisted up with the mobile fork lift. The trussmen peeled them off one at a time, installing them from the building outward towards the road.


Lyle, Sam and Troy are securing the first truss. Naturally, they again appeased the rats by first installing rat runs so the piggies can rest on them. Paul, on the far right, is actually working on the firewall from the topside. 2x8 boards are attached in the notches that were sculpted into the top of the firewall studs. The picture below shows this operation more clearly.


As evening descends, the last truss is peeled off the fork tines and dropped into its final resting place. It took a little clever maneuvering to get the truss off the tines without undue acrobatics by the roof bound workers. "They done good."


The Wood Pile - 
There is a pile of wood scraps to which some smaller folks were diligently adding throughout the evening. Wood pieces too small to use any more are designated for this pile.
I wonder what will be the fate of this material. The wood chunks that were used to hold the bolts in the walls were polluted with concrete when the walls were poured and the wood pieces were to be discarded. Brent was charged with loading the basket on the mobile forklift to dump them into the dumpster. He stopped for what seemed like several minutes and stared at the wood chunks. I thought I even saw a tear form in the corner of his eye. I saw concrete splattered wood pieces. He saw BTUs. BTUs that would be unavailable for heating his boiler at home. He did dump the load in the dumpster and not in his car, but it was a difficult decision. I am thinking he might be better prepared when the time comes to dispose of this wood pile.
Changing Seasons -
With the change of seasons upon us, the birds are flocking up, making practice runs for the flight south. The sandhill cranes, which Sam once referred to as "rib eye of the sky",  will soon be gone for the winter, I did not succeed in getting the picture of these magnificent birds in flight that I had hoped for, but maybe they have not yet gone (I hope, I hope, I hope). But if not this year, there is always next year, and I will try again.

 Also with the change of seasons come a new paint job for the blog. Out with the orange and in with the autumn buff color.

Monday, September 26, 2016

September 23 - Still More Firewall Work and a Cool Tool

A Very Wet Summer -
I do not want to confuse people with the facts  so I am not going to research history to compare this summer with its predecessors, but I do know that there has been a lot of rain. I suspect when the roof is finally on and the building is water tight, a drought will immediately begin. Aare uses a piece of construction lumber as a floating bridge to cross the moat protecting the middle of the building.


Along the back wall a small pond has formed. I am thinking that it is lucky it is not spring time or we would likely be chasing geese off of nests before we could start work for the day. Of course a swan or two would rather dress up the place.

Now that we see how complicated the firewall is, I am thinking maybe a cistern or two along the back wall might furnish adequate water for a sprinkler system and save all the bother of the firewall. Well, I suppose greater minds than mine have thought this matter through already. Besides, it is probably not a smart thing to cross horses in midstream, as my metaphor mixer used to say.
Finishing the Firewall Top Plate -


Ed, Ami, and Loren collaborated on finishing off the firewall top plate. Once again two segments must be joined in space without the benefit of a wall or ceiling to stabilize it. A couple more temporary supports were dropped across the firewall span and the endpoints of the wall segment were plotted. Then with the benefit of the cool little laser tool, the last segment was put into place. Here Ami joins the plate segments together.


Ed is caught red handed holding the board while Ami puts in a screw. The red laser line is delineating where the edge of the board needs to go.


The red line on the board is the edge line for the board coming in from the right. The plate consists of a double layer of these boards so another board will be placed under the joint securing both of these boards and strengthening the joint.


The ingenious tool that throws out these red lines is shown here. The laser is aligned along the edge of the angled wall. You can see the red beam just catching  the edge of the wall. It casts out a line from the left side of the box (the beam along the wall edge) and out the top, projecting a line on the overhead boards as shown above.


Where the angled wall meets the existing foam block wall, a vertical line shows on the foam block. The finished firewall will intersect the foam block wall along this line. So, building a wall at an oddball angle is a matter of getting all the edges to line up on the red lines. This incredible little device saves hours of layout work with chalk lines snapped between points that may not be very easy to locate in space. 

The white stuff on the beams at the top of the wall is Dave's intumescent  paint. I have been waiting anxiously to get that word back into the blog. For those seeking to impress acquaintances, intumescence is a noun meaning a swollen part of a plant or animal. So I think you could probably drop in a casual line like, "Oh look. The nasty bee that stung me left a painful intumescence." I am certain that will generate much more sympathy than an ordinary swelling.


Here Dave, who does carpentry when not painting, is marking a spot on the  plate with his red pencil. The red spot, which is marking where the stud must be located, is generated by the laser. Or maybe it is just the mark left by the red pencil he is using. 


Wednesday, September 21, 2016

September 19 - The Firewall Construction Continues

Correction - 
As difficult as it might be to believe, a previous post contained a factual error. The red sided boards being used in the firewall construction are not fire resistant. There is fire resistant plywood on site, that is red, and will be used as sheeting over the top of the firewall and eight feet to either side of it. The chronicler confused a comment about the red plywood with the red banded manufactured wood boards regarding being fire resistant.
So, it turns out the firewall is stuffed with combustible material. The fire resistance relies on the plywood decking on the top, the concrete floor and blocks below, the double layers of Sheetrock on both sides, and, not to put too much pressure on Dave, a layer of intumescent paint.
The doors and windows must be installed and they also will hold a fire at bay, but at the moment I am not sure how that works. Like a former workmate and metaphor mixer used to say, we will burn that bridge when we come to it.

Building the Wall - 
Constructing a custom wall is a painstaking process. Each stud must be carefully measured for its location with no two studs the same length. Since the top plate is sloping up into the sky, the top of each stud must be cut on an angle. With the studs being so long, it takes three people, a lift and a laser level in addition to the tape measure to figure the correct length.
Here we see Bob at the bottom, and ...


Loren in the lift, getting the measurement for the first one.


Ami uses a circular saw to sculpt the top end of the stud. Like works of art, each stud is unique, sculpted to the proper measurement and top angle to fit its spot.


On the left is a completed stud top sculpture.


The first stud, fastened with screws at the top and bottom, the stud is securely settled in its new home. We will pass on a house warming party since we dare not get the stud too warm.


Each stud in succession then must have its spot measured for length. Ami holds the tape at the bottom while Loren and Bob maneuver above, locating the correct spot for the stud using the laser. We see the laser on the bottom plate in front of the tape and, in the picture below, the spot on the upper plate where the stud must be placed. The whole process looks a bit tedious but its gotta be done.


I asked Bob a question about some detail on the firewall and he responded with this picture. I include it without further explanation since it came with none. Now you, too, can frame a firewall.


More and Brighter Lights -


Phil brought the other lift inside, making the building resemble an industrial parking ramp.


He used both of them to string up more lights inside.


The new lights were powered from the same generator that powered Bob's saw. The poor little generator was not up to handling all the demand. The saw motor starting caused the lights to dim unevenly. It also caused Loren to fade out of the picture.


The new lighting did make for a pretty picture as the darkness descended on the building site.
One More Interesting Sight - 


There is a room being built above the restrooms that will house some furnaces. Dave and Ed (legs shown dangling from above) are adding some needed framing members. Dave is using a lever, and a good deal of muscle,  to force the long 2x4 upwards to raise the horizontal member that Ed will then secure with nails when properly placed. Hercules meets Archimedes.